PRESSURE TREATED DECK REPLACEMENT
PRESSURE TREATED DECK REPLACEMENT
![]()
The home is in Raleigh, NC, and was built in 1972. It still had the original deck on it, which is a testament to how strong the treatment of the wood was back then. As you can imagine, 40+ years of weathering took its toll on the wood. Some of the surface area had become rotten, and all the handrails were loose. It was not safe for the homeowners to use.
The homeowner contacted Odyssey requesting a quote for a deck repair. More specifically, the homeowner wanted us to “Resurface” their deck; meaning that we remove all decking boards, stairs & handrails, leaving only the framing members in place, and building back up from there. Deck resurfacing can be a great, and more affordable, option for homeowners, so long as the structural components (joists, posts, etc.) are in good shape. Given the condition of the old deck, we advised the homeowner to let us pull off a couple of deck boards to see if we can reuse the floor joists and framing members. Unfortunately, the rot had spread too far, and we were going to be unable to salvage the framing.
We start every deck project with a professional rendering of the proposed deck, which is created by our architect. This is to ensure that we are compliant with the local building codes. The rendering is also very valuable to the homeowner in the event of a sale of their home. Once we obtain the deck rendering, we present this, along with the plot plan and drawings, to the permitting office for approval. Obtaining a permit is the standard for any structural job with Odyssey, and we do not deviate from this process.
Once we had the approved permit, we started the project by removing all the old wood deck, and then removed the original concrete footers. The footers no longer met local building codes, so the architect advised they be re-poured.
Once the new footers were in, it was time to call for the county to do an inspection of them. Framing can’t be started until the county signs off on the footers supporting the structure.
After getting the counties approval, we had top tier lumber delivered for the build, the product is known as “KDAT”. KDAT lumber is a pressure treated product that is “kiln dried” to remove the excess moisture content from the wood. Installing pre-dried wood eliminates most all warping and shrinking that you see with regular pressure treated wood. The KDAT that we use for the surface and handrails of a deck project is always #1 lumber (#1 grade lumber has little to no knots, very few blemishes and is always straight). We use #2 lumber for the framing members that won’t be seen, bringing down the cost of the project.
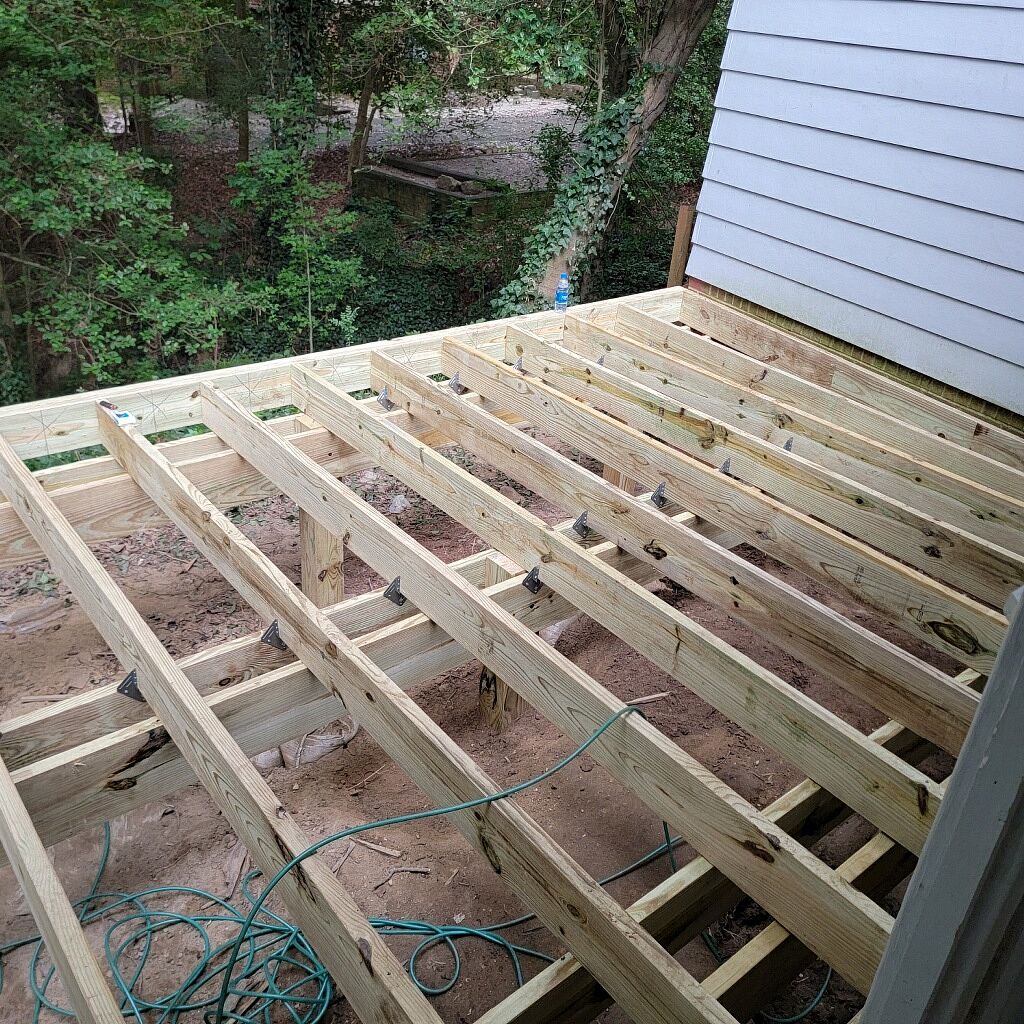
The actual framing began with the installation of new flashing and a new “band joist” against the home. The band joist is what attaches the deck to the home. The posts used on the footers was a 6”x6” product, which is more than is required, but looks much better upon completion. 4”x4” posts, on a large deck, make the deck look flimsy and poorly built. To add the structural stability, we installed “struts” at a 45-degree angle to the deck and band board. This made the supporting structure extremely sturdy.
The perimeter of the deck was created using 2×10’s that were doubled up for strength. The joists we used were also 2×10’s. The joists were then fastened to the band joist using “joist hangers”. A 2”X2” wood ledger will also do the job, but the hangers are the better, longer lasting, option.
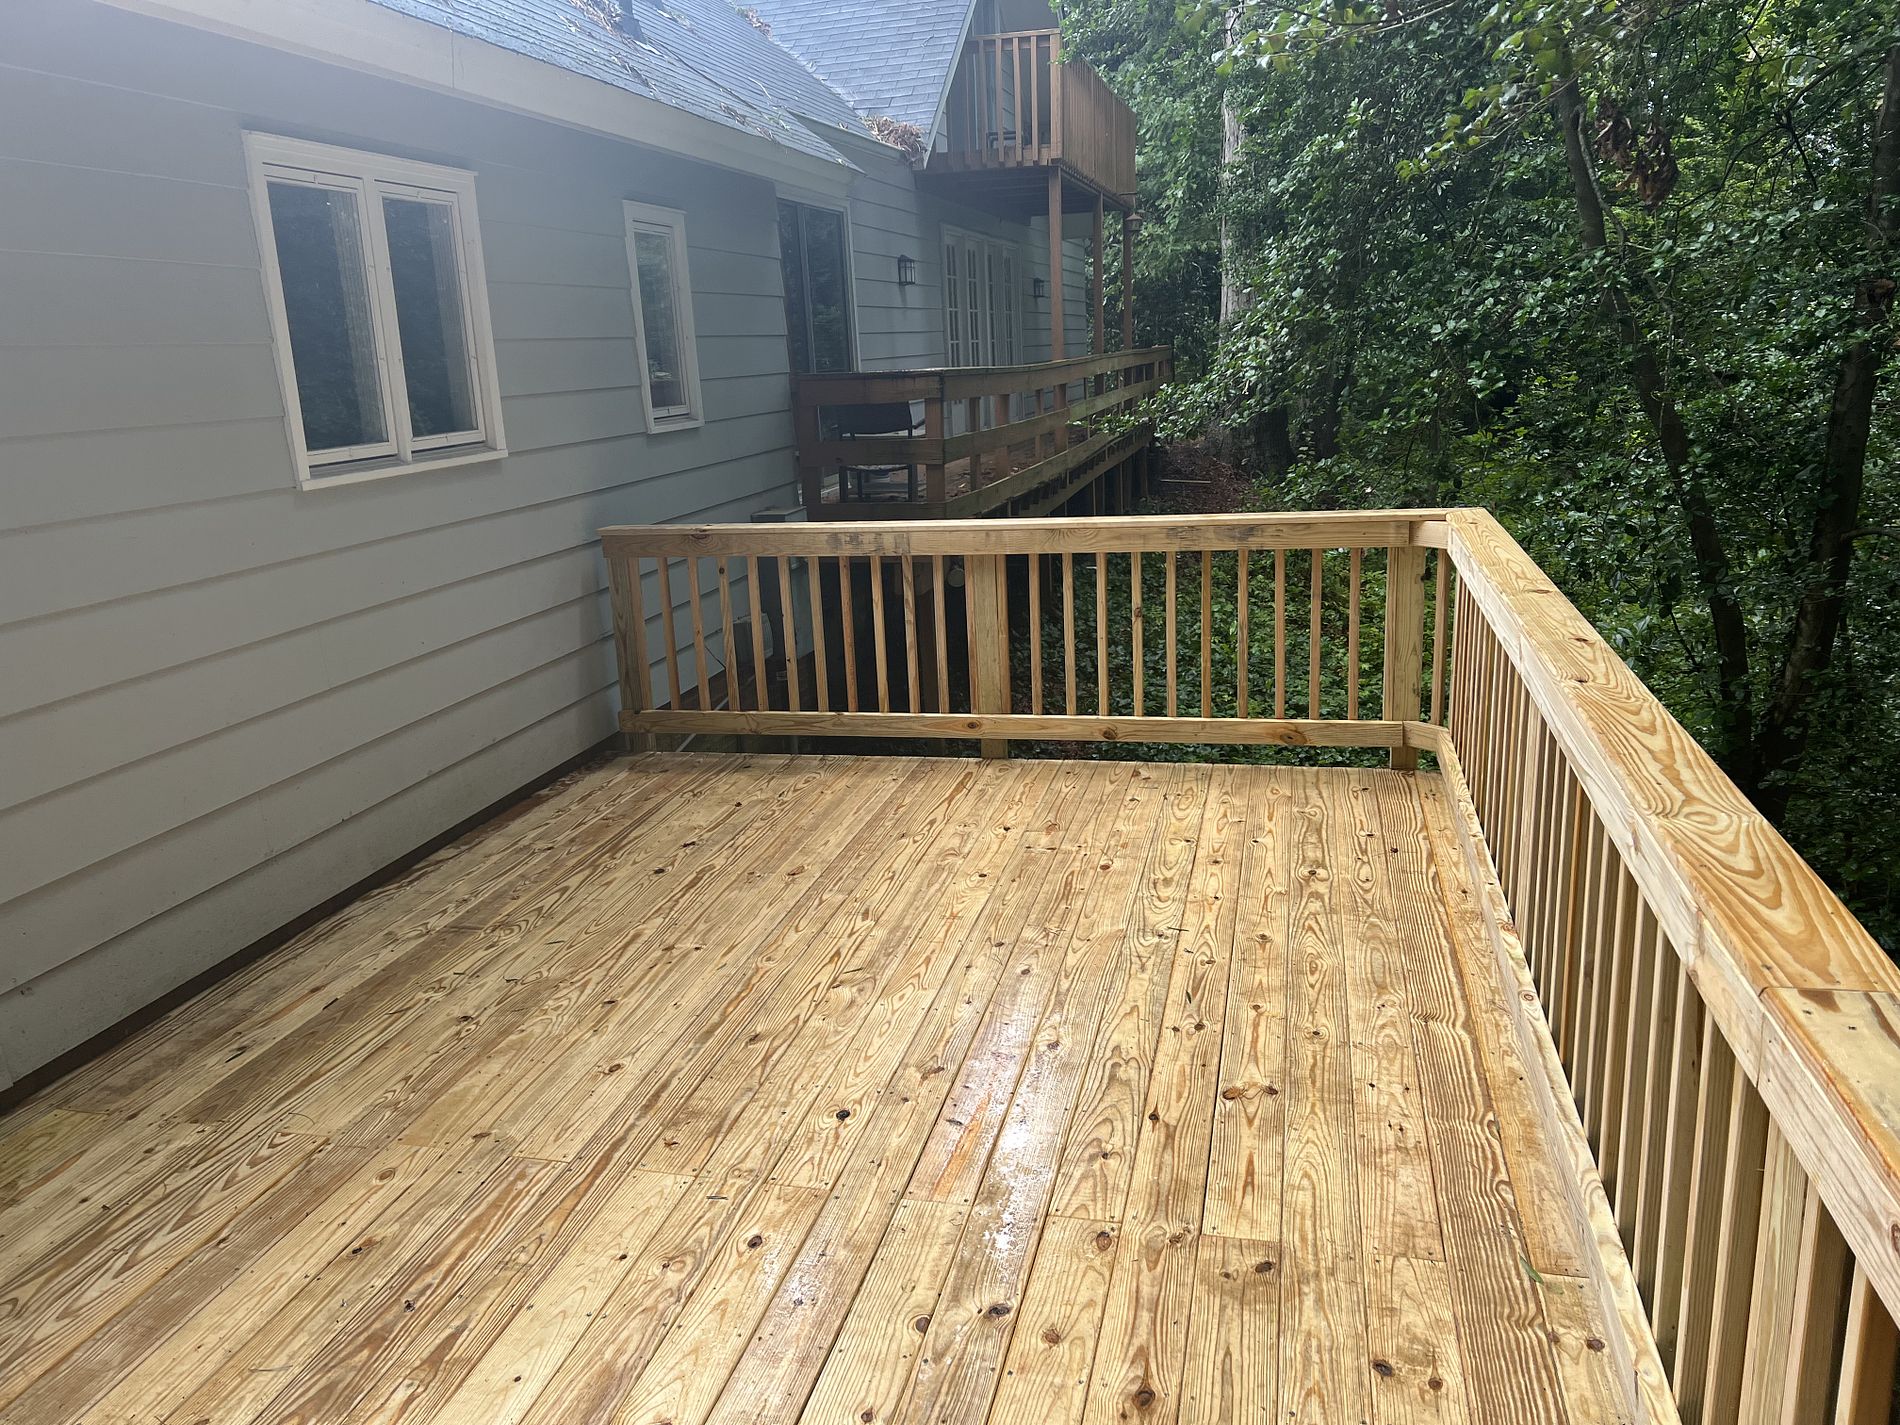
Once the frame was completed, we began installing the #1 KDAT deck boards. The boards, along with all other surface structures, were screwed together. Using screws does take more time, but it also prevents most warping (though that’s not a problem when using KDAT), and holds the components together much tighter. We were sure to leave a 1/8” gap between all deck boards so that there will be sufficient drainage during a heavy rain. When installing regular pressure treated wood, the deck boards are installed tight against one another because it is assumed that they will shrink as they dry.
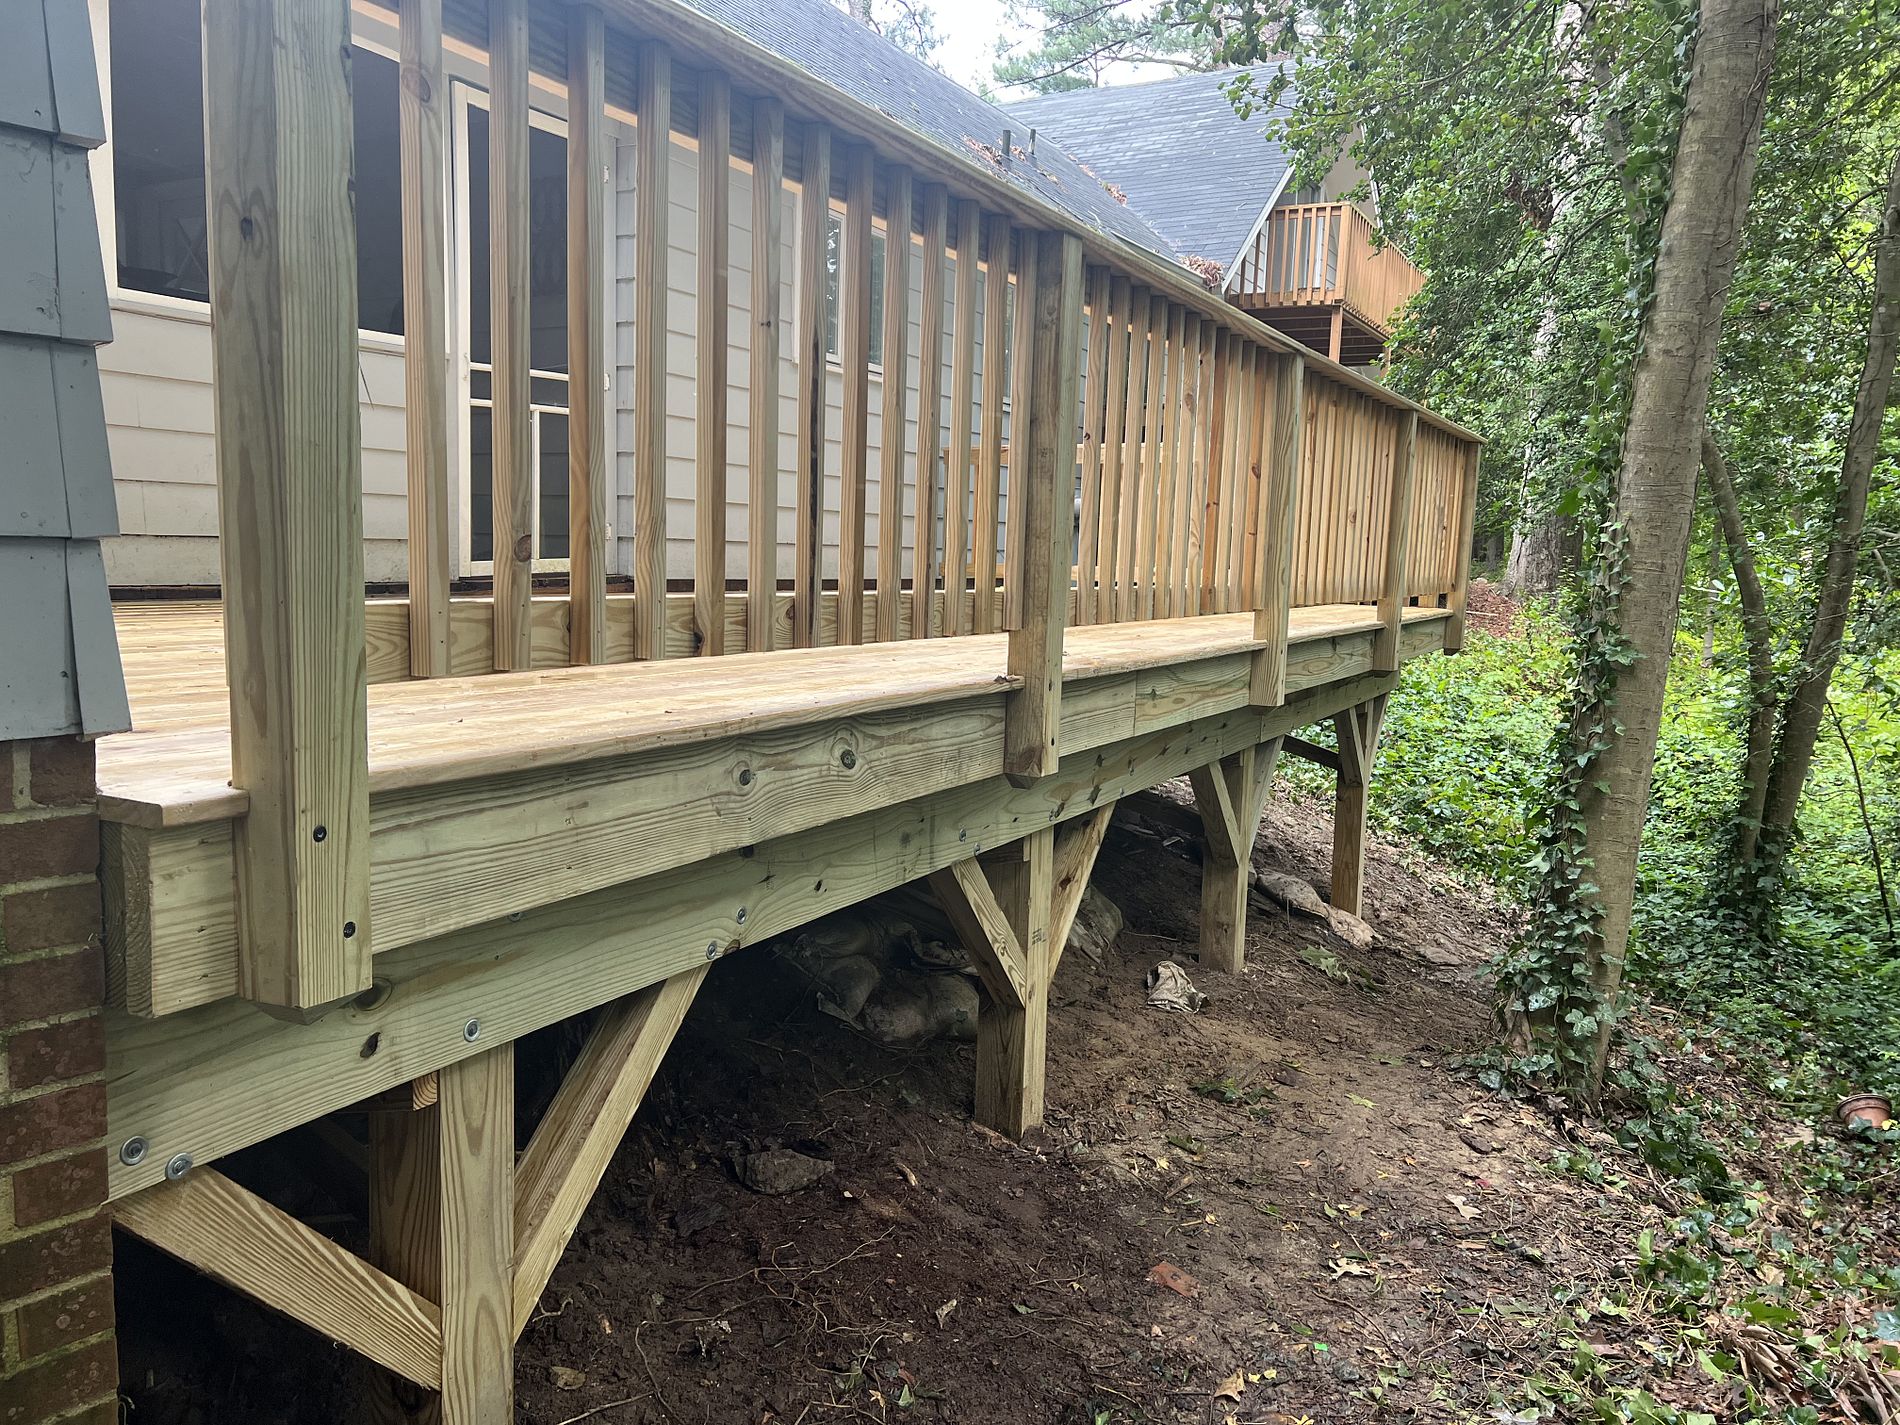
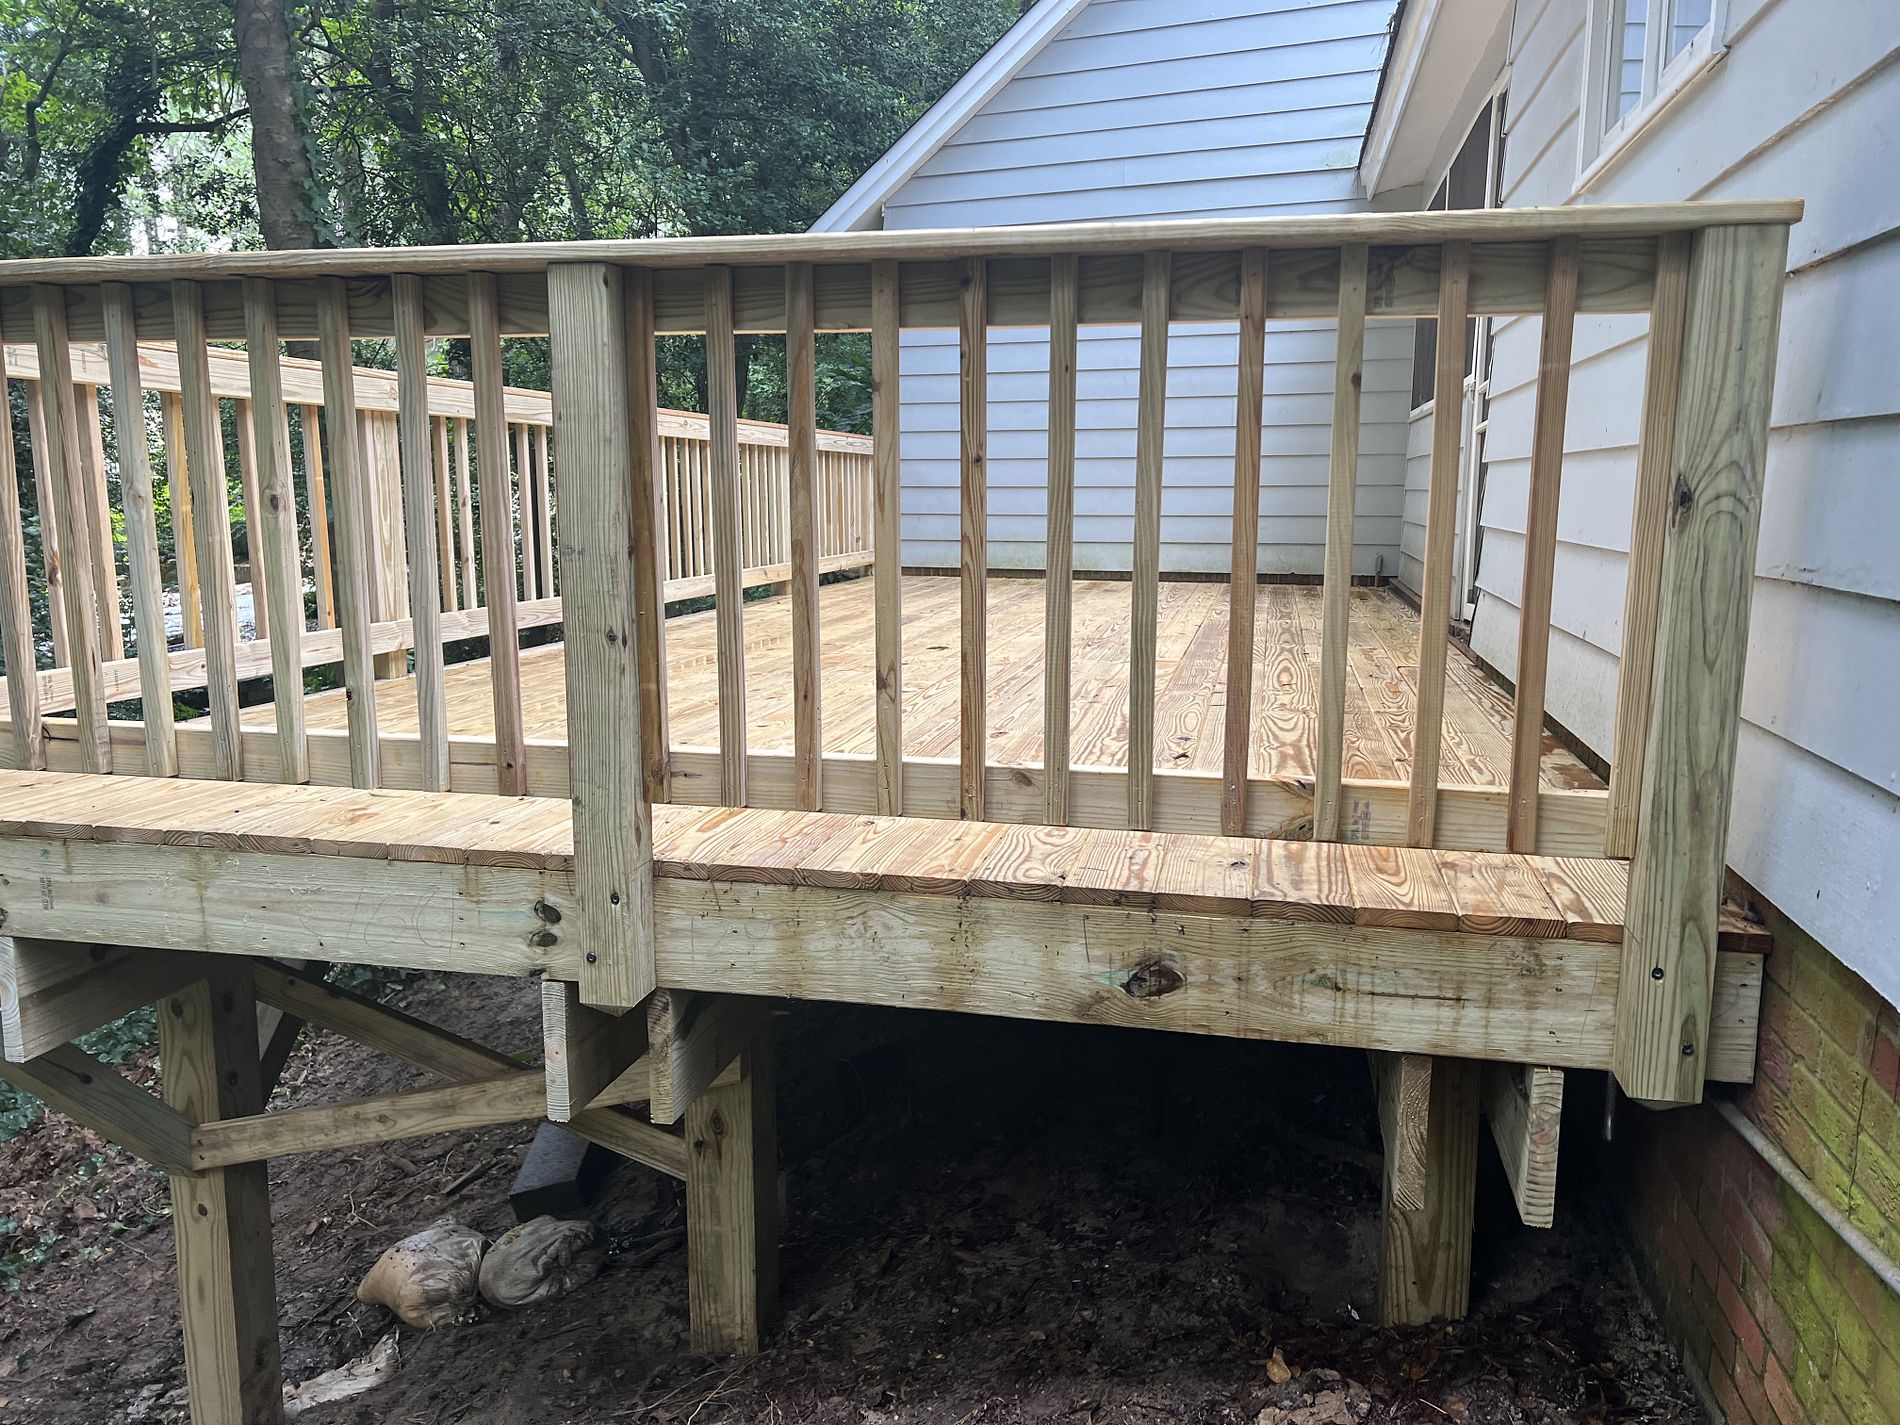
Upon completion of the deck surface, we installed a “sweep rail” handrail system. The sweep rail is comprised of a 2”x4” near the deck surface, and one at the top of the posts for the balusters to attach to, then a 2”x6” cap for aesthetics. We also routered, then sanded, all corners and edges of the 2”x6” handrail cap, leaving a very smooth and clean finish.
Have a look at the before and after pictures to see the results! You can also follow us on social media to check out our future projects or view more of our projects on our website.
Before Pictures
![]()
")
")
During Pictures
![]()
")

After Pictures
![]()
")
")
